

How To Repair Worn Guitar Frets
If it's hard to coax rich tones from your acoustic, your guitar may demand to have its frets leveled.
When yous play your guitar, pushing its strings down confronting the frets causes them to wear. Depending on how hard you grip the strings, this metal-to-metallic contact tin can cause the frets to develop divots or modest depressions. As a guitar'southward frets become uneven, vibrating strings lose sustain and clarity, intonation gets compromised, bending tin can become difficult, and it tin feel like you're fighting to get good tone from your guitar.
Eventually you lot may need to replace worn frets with new ones—a chore for a professional—but before yous reach that point, at that place's a lot you tin do yourself to continue your guitar in good playing condition.
People use different terms to describe basic fret maintenance. I've heard it chosen fret leveling, fret handling, recrowning, grind and polish, and fret milling. Any you call it, the process and goal is ever the same, and that is to reshape and recrown the frets and so they have an equal height (with the exception of the last v to 8 frets, which I'll explain in a moment).
People use different terms to depict basic fret maintenance. I've heard it called fret leveling, fret treatment, recrowning, grind and polish, and fret milling.
Merely first, a word of caution: Fret leveling is not a coincidental project. Different adjusting pickup meridian or intonation or a truss rod, it involves actions that tin can't be undone. To level and recrown frets, you lot demand the proper tools, a steady hand, and a lot of patience. The tools alone volition probably toll more than hiring a pro to do the chore on a single guitar. If you have several guitars and an innate interest in maintaining them, learning to level frets tin be worthwhile. But if you lot're not prepared to invest in the tools or have the time required to execute this delicate task, then practise yourself a favor and take your guitar to a qualified tech.
That said, even if you make up one's mind to hire someone to level your frets, understanding what'southward involved can be useful—peculiarly if you purchase used guitars or deal regularly with guitar techs. Knowledge is power, equally they say, and so read on.
Projection overview. To illustrate the fret leveling process, nosotros'll use a Manea jumbo acoustic a client recently brought in for work (Photo ane). It's a great-sounding musical instrument, only over time the frets have become uneven and many are no longer properly seated in the fretboard. Our task is to seat those frets deeply into the fretboard, and and so level and crown all of them.

Photograph 2
Before yous start a project, it's important to gather the necessary tools and supplies. Photograph ii shows the items I use for a fret level: a 24" fret leveling bar, a two-sided fret crowning file (designed to round the top of both minor and medium fretwire), a fretting hammer, a truss rod wrench, self-agglutinative sandpaper (400 and 1500 grit), thin superglue, razor blades, 0000 steel wool or Planet Waves fret-polishing paper, and a flathead screwdriver.
Yous can buy nearly of these tools and materials at a home improvement shop or online from such retailers as Stewart-MacDonald.
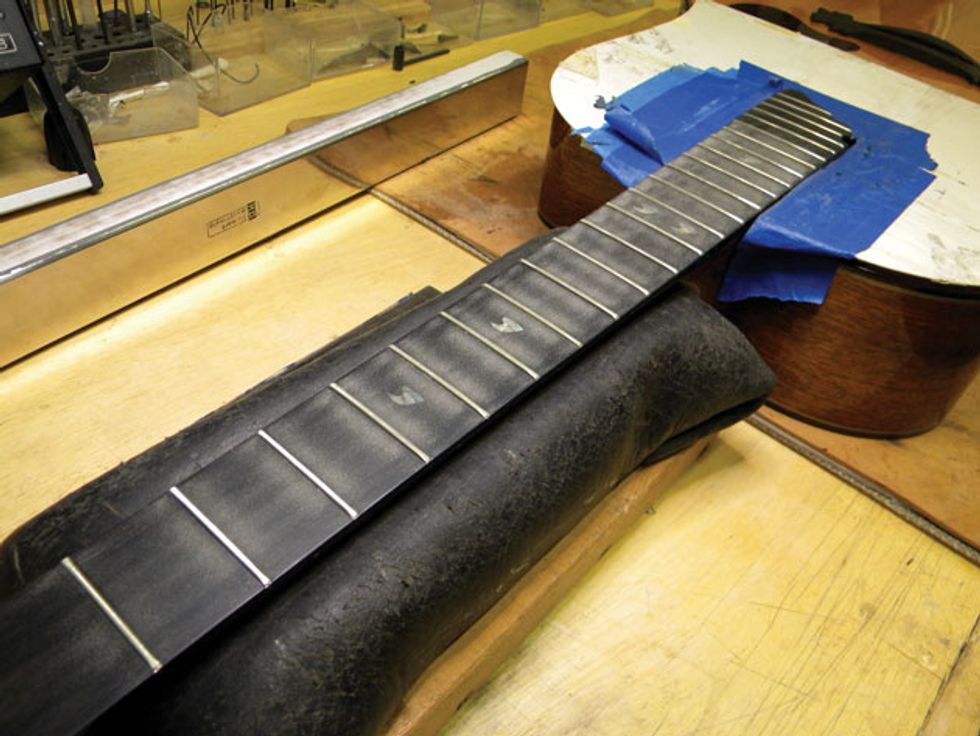
You need to immobilize the guitar to perform accurate fretwork. To support the neck, I apply a 25-pound bag of buckshot wrapped in leather. Alternatively, you tin can utilize a bag of sand that'due south similarly wrapped. I also remainder the guitar trunk on a piece of leather to protect the instrument and keep it from sliding around.

Photo 3
Finally, I strongly recommend placing a guard over the soundboard in instance you slip with a tool while leveling or recrowning the frets. This protective surface—a thin sheet of plastic or even paper-thin—should encompass the summit around the fretboard extension (Photo three). Brand sure the guard is sparse enough that you can access the frets, yet thick enough to provide protection from abrupt tools. You tin can secure it with bluish painter'due south tape.
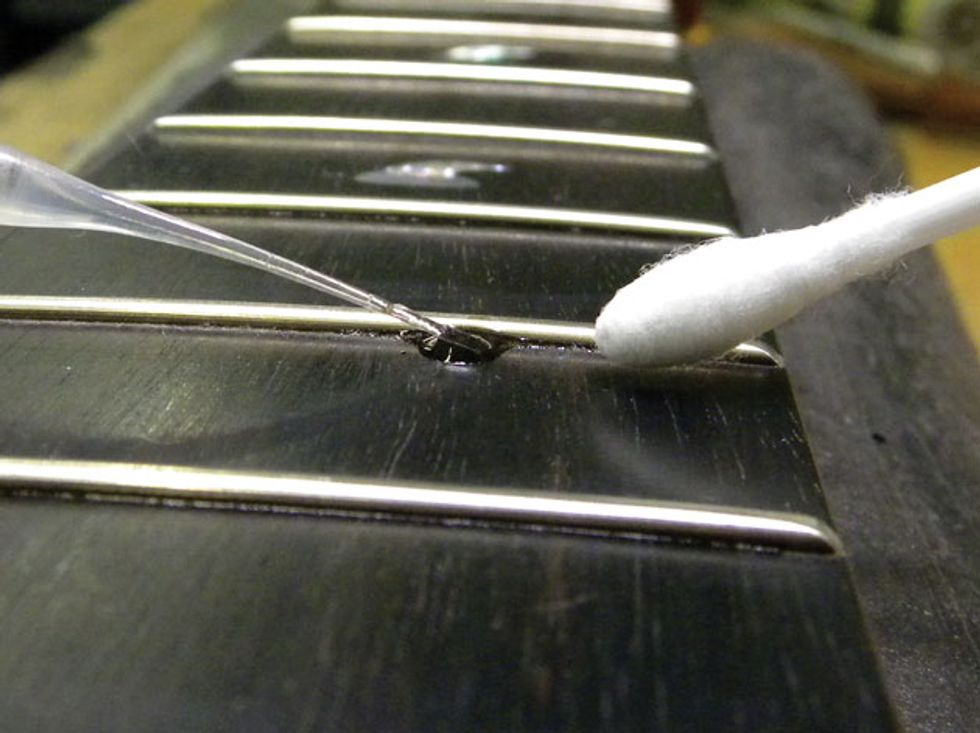
Photo 4
Size matters. Before you begin grinding on the frets, you lot demand to confirm they're tall enough to level and recrown. To practise this, I use a luthier's digital caliper. Available from stewmac.com, the tool is designed to allow you mensurate fret height right off the fretboard. On this Manea, the fret height measured .043"—a skillful height for frets on an acoustic guitar. If the electric current frets measure less than .038", they'll be too hard to recrown after being leveled, and that means new frets are required.
Tap and seal. After removing the strings, place the guitar neck onto a secure platform, and then remove the nut (I demonstrate removing a nut in this PG DIY video, "How to Convert a Flattop into a Choked Guitar").
Next, check the frets to brand sure they're securely seated in the fretboard. Shine a bright lite forth the fretboard to run into if any frets have sprung loose from their slots. The flat bottom of the crown should sit flush to the wood. If you encounter a fret that's come up up, gently tap it downwardly with a fretting hammer so run a bead of thin superglue along each side of the fret to agree information technology in place.
Drop Off and Fall Away
Nearly acoustic guitars have what's chosen a fall away or driblet off at the cease of the fretboard where it extends over the top. This is a upshot of the neck angling downwards very slightly into the guitar to provide room for the strings to vibrate without hitting the frets. If the fretboard doesn't drib off, it could exist a sign of a low neck angle. If you see this on your guitar, I recommend you have it to a qualified luthier for advice. Correcting low neck angle requires major surgery. At the very least, the frets over the fretboard extension may accept to be dramatically filed down.
Note: Whenever you have superglue in ane hand, ever have a Q-tip in the other. The Q-tip lets you quickly soak up any excess glue (Photo 4). Be very sparing when applying glue along the frets. If you use also much, it tin can spill over onto the cervix. Thin superglue travels fast, so exist prepare with your Q-tip.
Leveling the frets. Once the frets are all seated, it'south fourth dimension to begin leveling them. Different luthiers accept unlike techniques for doing this. Here's my approach: Place the leveling bar beyond the frets and adjust the truss rod until the bar is touching most—if not all—the frets. This process tin have several attempts, so be patient.
Once the leveling bar is touching as evenly as possible, attach 400 grit self-adhesive sandpaper to the leveling bar, place it perpendicular to the frets, and so gently brainstorm sliding the leveling bar along the frets. I similar to start on the bass side and gradually piece of work my mode to the treble side of the fretboard. Don't press likewise hard, just skim the surface of the frets with slow, controlled motions.
After a few passes, check the frets for scuff marks. Once more, use a bright light to see if y'all are contacting all the frets evenly. If not, then you lot may have to readjust the truss rod. Proceed using your leveling bar to remove more fret material.
Photograph 5
About those concluding few frets. When the frets are perfectly even, they should all have file marks with the exception of the last 5 to eight frets (Photo 5). If those last several frets don't have any file marks, but the rest of the frets do, that's okay. It merely means the fretboard has what'due south called a fall away or drop off. For more details, read the "Drib Off and Fall Away" sidebar.
However, if you meet you're filing the last few frets, simply not the frets in the middle of the fretboard, there's a problem. Either the truss rod is besides loose, which creates a bow or dip in the middle of the neck, or the fretboard has a "kick-up." The latter is a condition that requires professional surgery to repair.
Recrowning. To ensure that a guitar intonates correctly and plays comfortably, the newly flattened frets need to be shaped to provide a narrow, precise point of contact for the cord. This is called recrowning.
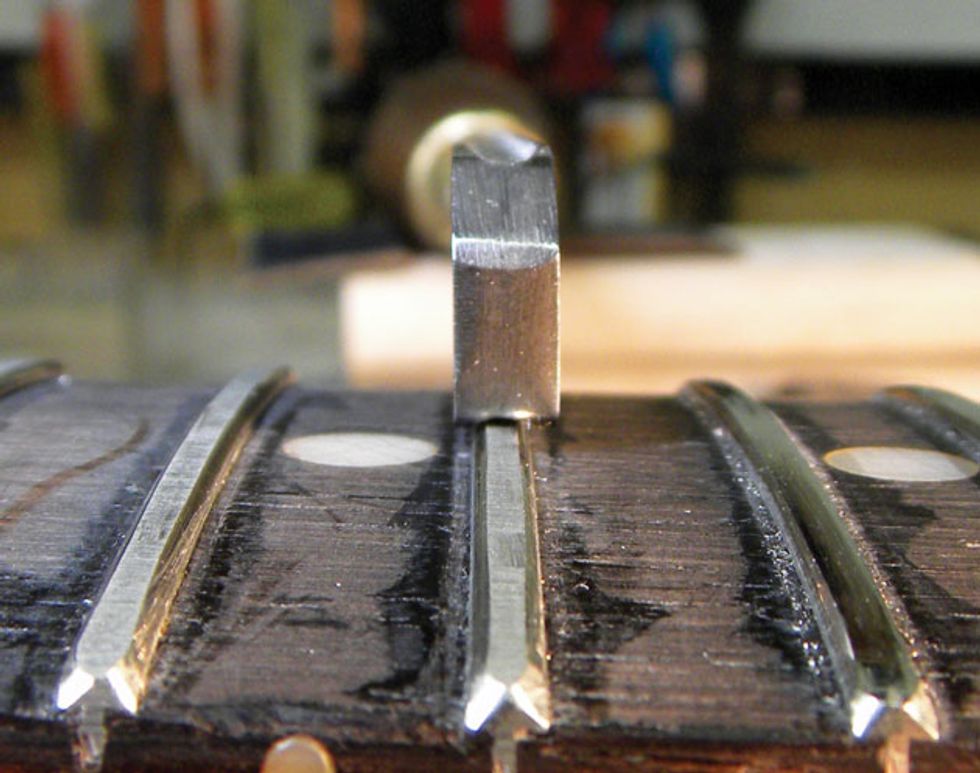
Photo 6
Fret-crowning files have concave grinding surfaces that run along their border. Typically each edge is a different size to accommodate dissimilar widths of fretwire (Photo 6).
Once you lot choose the appropriate border of the file to fit your fretwire, place the file along the peak of a fret, and glide information technology frontward, filing in but one management. Use slow, gentle strokes to remove metal from each side of the fret, while leaving the top untouched. The goal is to produce a nicely rounded playing surface with a peak that runs along the eye of the fret.
After every few passes, clean your file with a wire brush to forestall metal build-upwards in its teeth. Repeat this process for every fret. Some frets volition take longer than others to crown, then take your time and be thorough. When the job is finished, you should encounter a thin line of scuffmarks running along each fret that's about the width of a high-E string.
When the frets are all recrowned, alter the sandpaper on the leveling bar to 1500 dust. Using a light touch, glide the bar along the frets parallel with the cervix to ostend that the fret tops are all level. If they are, then glide the leveling bar over the frets once more, this time working along the length of the frets, perpendicular to the neck. This will remove the scuffmarks and smooth out whatsoever inconsistencies on the crown of the frets.
Finishing touches. Now nosotros enter the clean-upward stage. To remove any tool marks left in the wood by your recrowning file, advisedly scrape the fretboard with a razor blade. Do caution and don't push as well hard. If you slip, you might gouge the fretboard or even the frets you only worked and so hard to reshape. With any tool marks removed, you're ready to polish the frets with 0000-steel wool to make them expect perfect.
Tip: Whenever you employ steel wool effectually magnetic pickups, first cover them with painter'southward tape to prevent fiddling metallic fibers from collecting on the pole pieces.
Finally, reinstall the string nut, put on a new gear up of strings, and savor the feel of freshly leveled, crowned, and polished frets.

Source: https://www.premierguitar.com/pro-advice/guitar-shop-101-squeezing-more-life-out-of-worn-frets
Posted by: robinsonwhissent.blogspot.com
0 Response to "How To Repair Worn Guitar Frets"
Post a Comment